Tasks
Preview mode: progress is saved locally and not synced to a room.
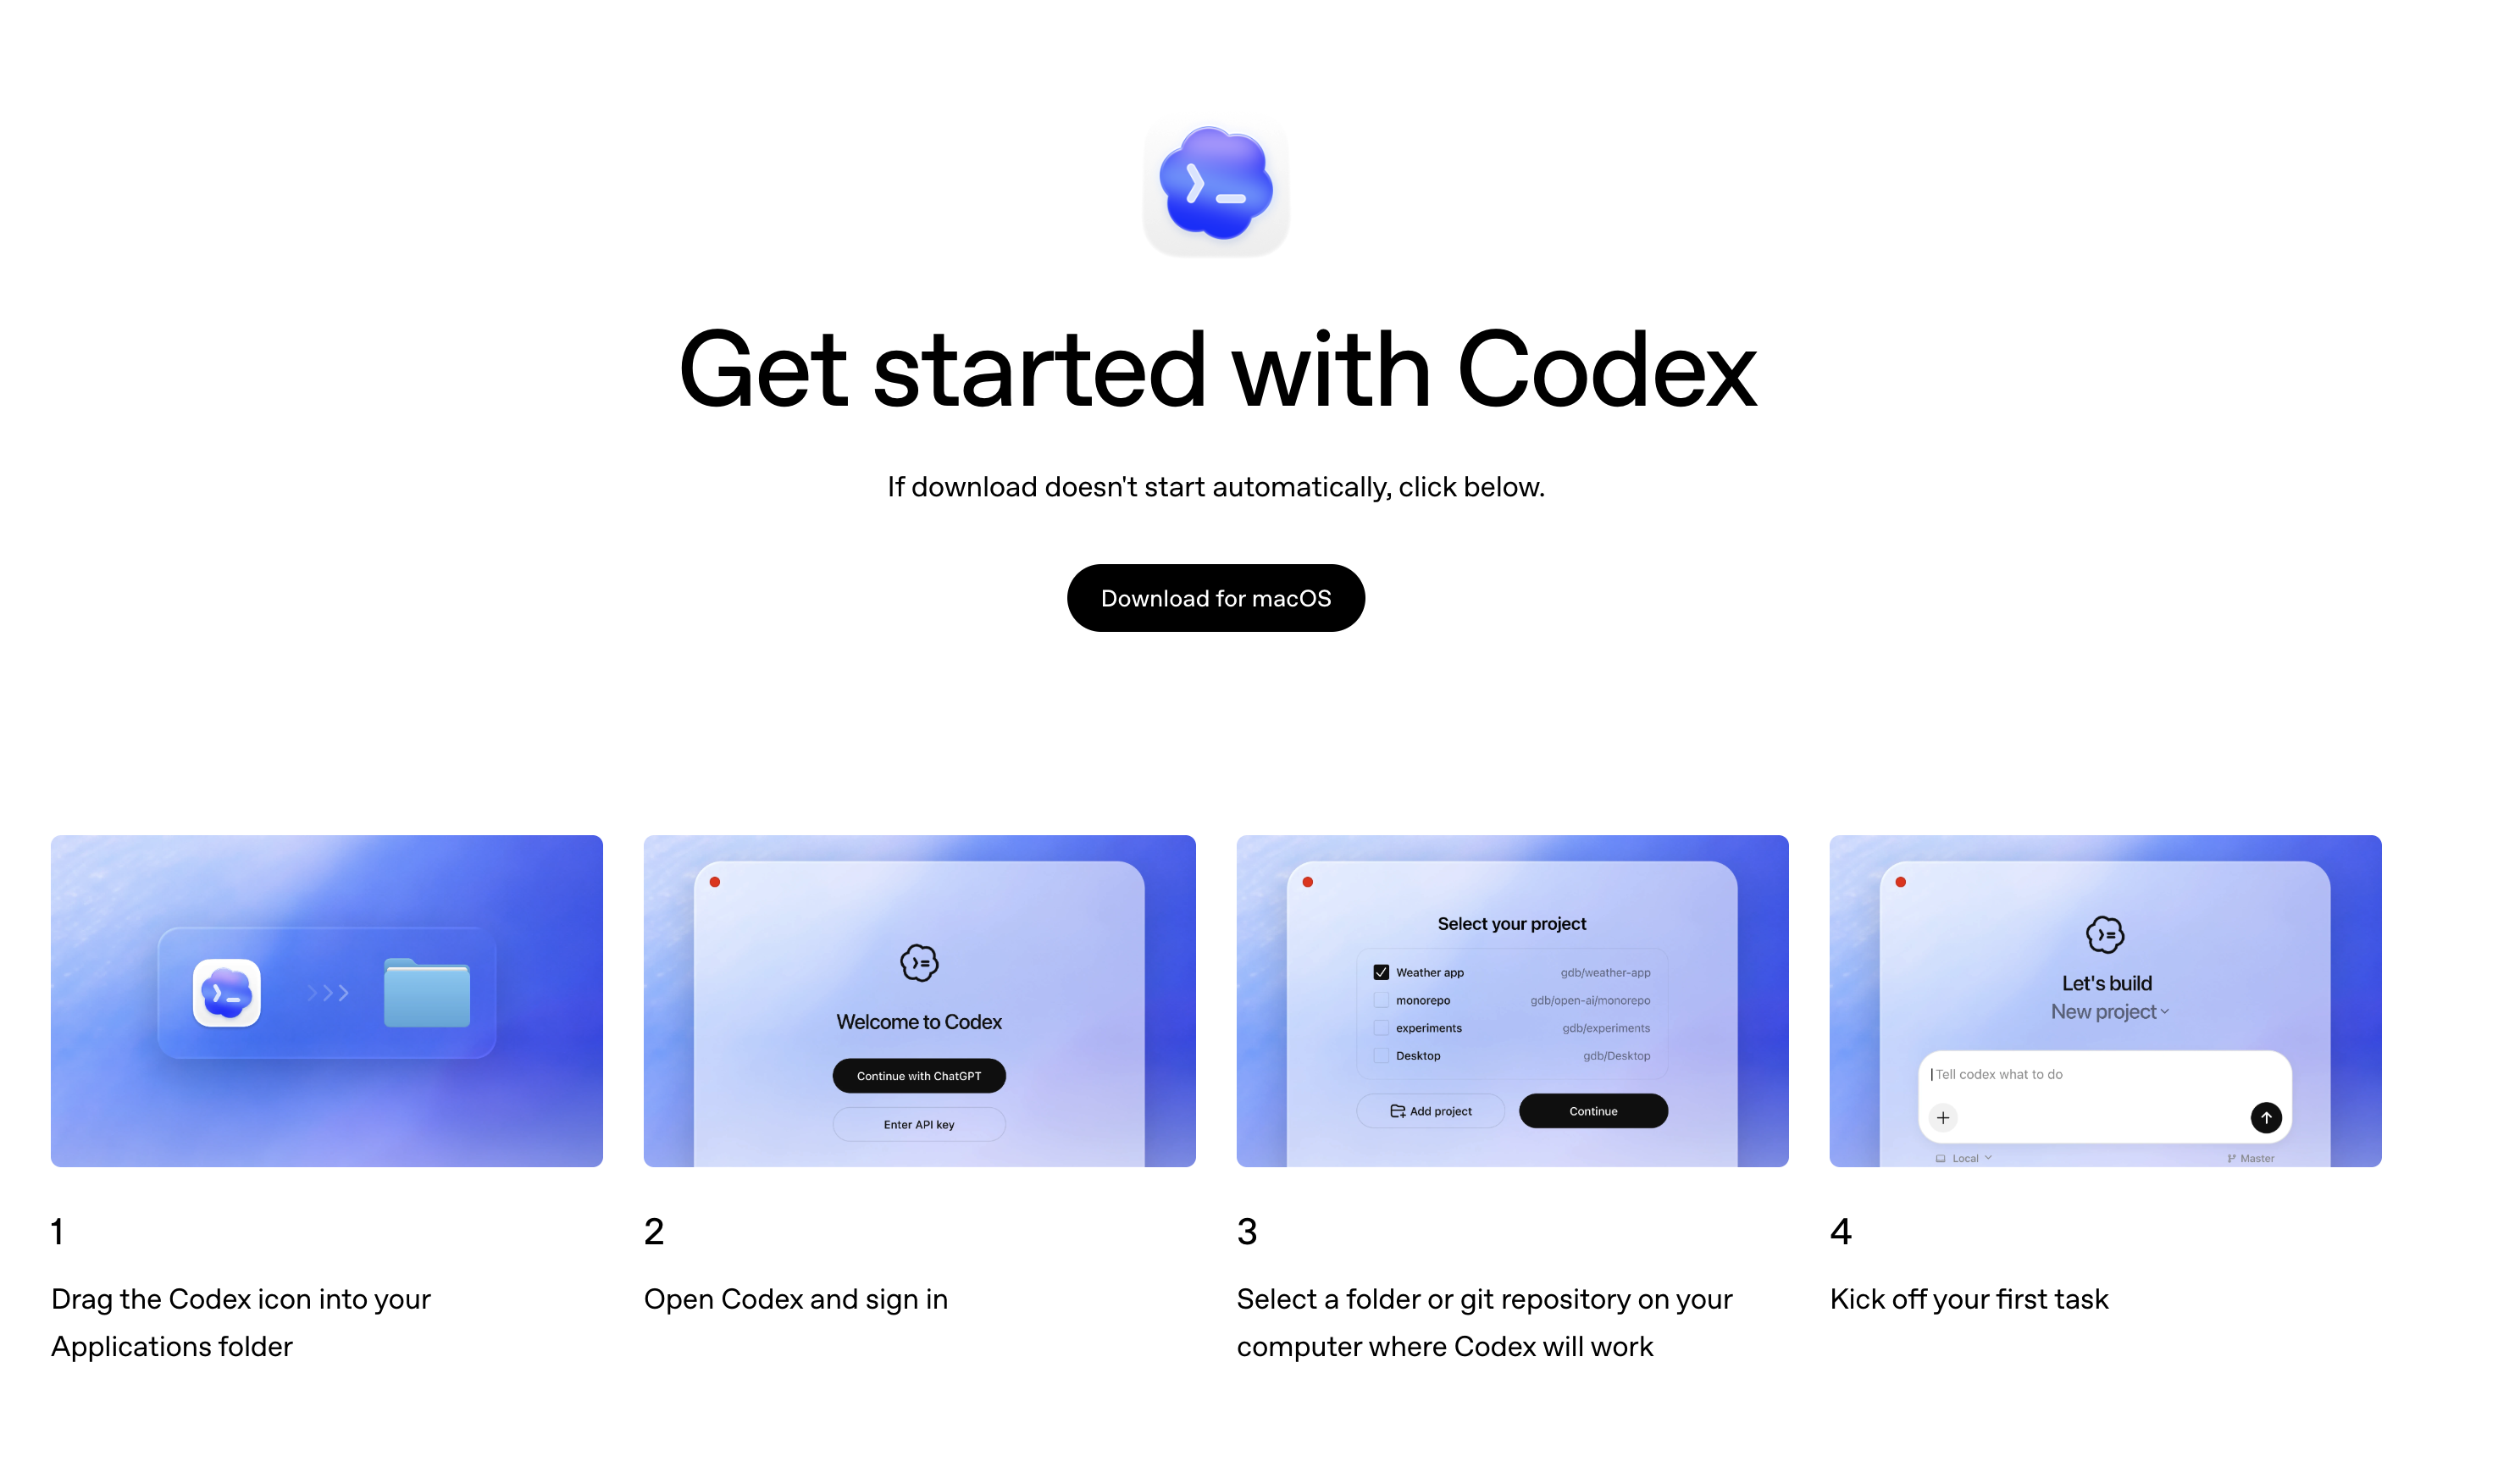
Install Codex on your chosen surface before you dive into the workshop.
- Download and install the Codex desktop app: use the standard download on Apple Silicon Macs, or the Intel Mac download on Intel Macs.
- Open the app from your Applications folder.
- Confirm the app launches to the onboarding screen.
Make sure Codex is signed in with the same ChatGPT account you use on the web.
- In the Codex app, click Continue with ChatGPT.
- Complete the browser sign-in flow with your ChatGPT account.
- Return to the app and confirm you are signed in.

Pull down the sample repository you'll use throughout the exercises by cloning
agentsmd/agents.md(or downloading the ZIP and renaming the folder toagents-md-repository).-
On Windows, use PowerShell or Windows Terminal from the parent folder where you want
agents-md-repositoryto live. -
Clone the repo with
git clone https://github.com/agentsmd/agents.md.git agents-md-repository(or download the ZIP from https://github.com/agentsmd/agents.md and rename the folder toagents-md-repository). -
Open a separate terminal for the dev server and launch it:
cd agents-md-repository
npm install
npm run dev
If
npm run devdoes not start cleanly, try these checks before moving on (or ask Codex for help):- Confirm you are inside
agents-md-repositorybefore runningnpm installornpm run dev.- If
npmis not recognized, install a current Node.js LTS release, then open a new terminal window and retry. - If
npm installwas interrupted or dependencies look incomplete, runnpm installagain before changing anything else. - If port
3000is already in use, runnpm run dev -- --port 3001and openhttp://localhost:3001instead. - If the error mentions Turbopack, open
package.jsoninagents-md-repository, change"dev": "next dev --turbopack"to"dev": "next dev", save, and rerunnpm run dev. - If you see a message that
next lintis not valid in Next 16, treat that as a linting issue rather than a blocker for this step and continue focusing on the dev server. - Next.js telemetry is optional. If your environment requires opting out, run
npx next telemetry disablefrom insideagents-md-repository.
- If
- Leave that terminal running.
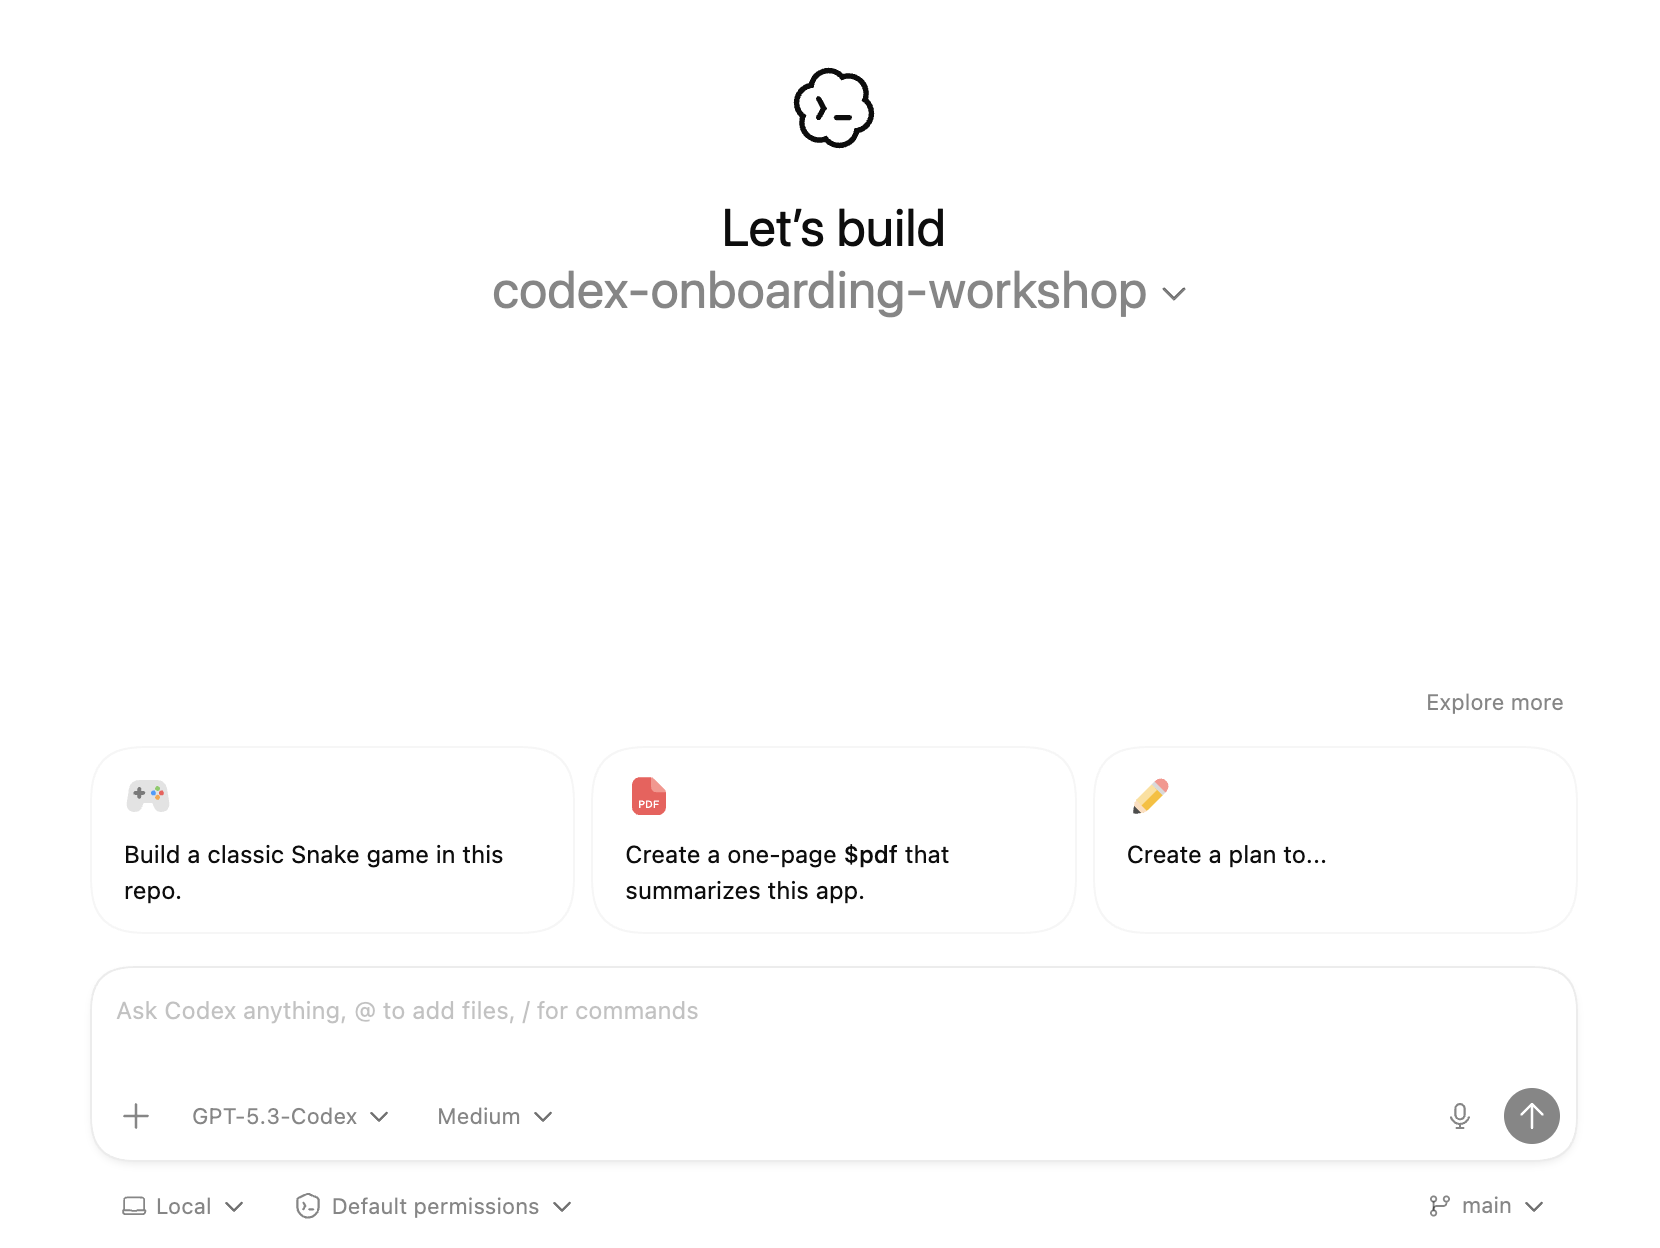
- In Codex, choose Select your project and pick the
agents-md-repositoryfolder so the chat input becomes available.
-
Tune Codex to the low reasoning before prompting. When you finish testing.
- In the Codex app, open the model picker in the chat composer.
- Choose gpt-5.5 and set the reasoning preset to Low before sending the next prompt.
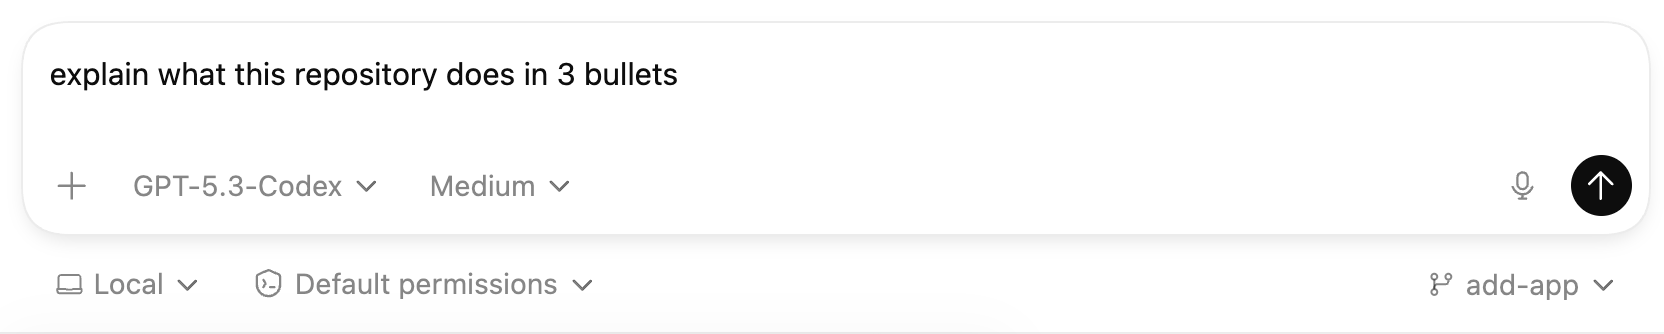
Practice asking Codex for analysis without editing files.
- In the project chat, ask:
Explain what this repository is doing in short. - Send the prompt and confirm Codex responds in the chat thread.
- In the project chat, ask:
Return to the recommended default model before continuing.
- Open the model picker in the Codex app and select gpt-5.5, then set Medium reasoning.
- Continue subsequent tasks with this model selected so everything runs on the recommended setup.
Run the following prompt to generate a visualization asset for the repo. If you have not completed the Get the reference repo task yet, do that first so you are working inside
agents-md-repository.-
Open or switch the Codex app project to
agents-md-repository. -
Start a new project chat in that project.
-
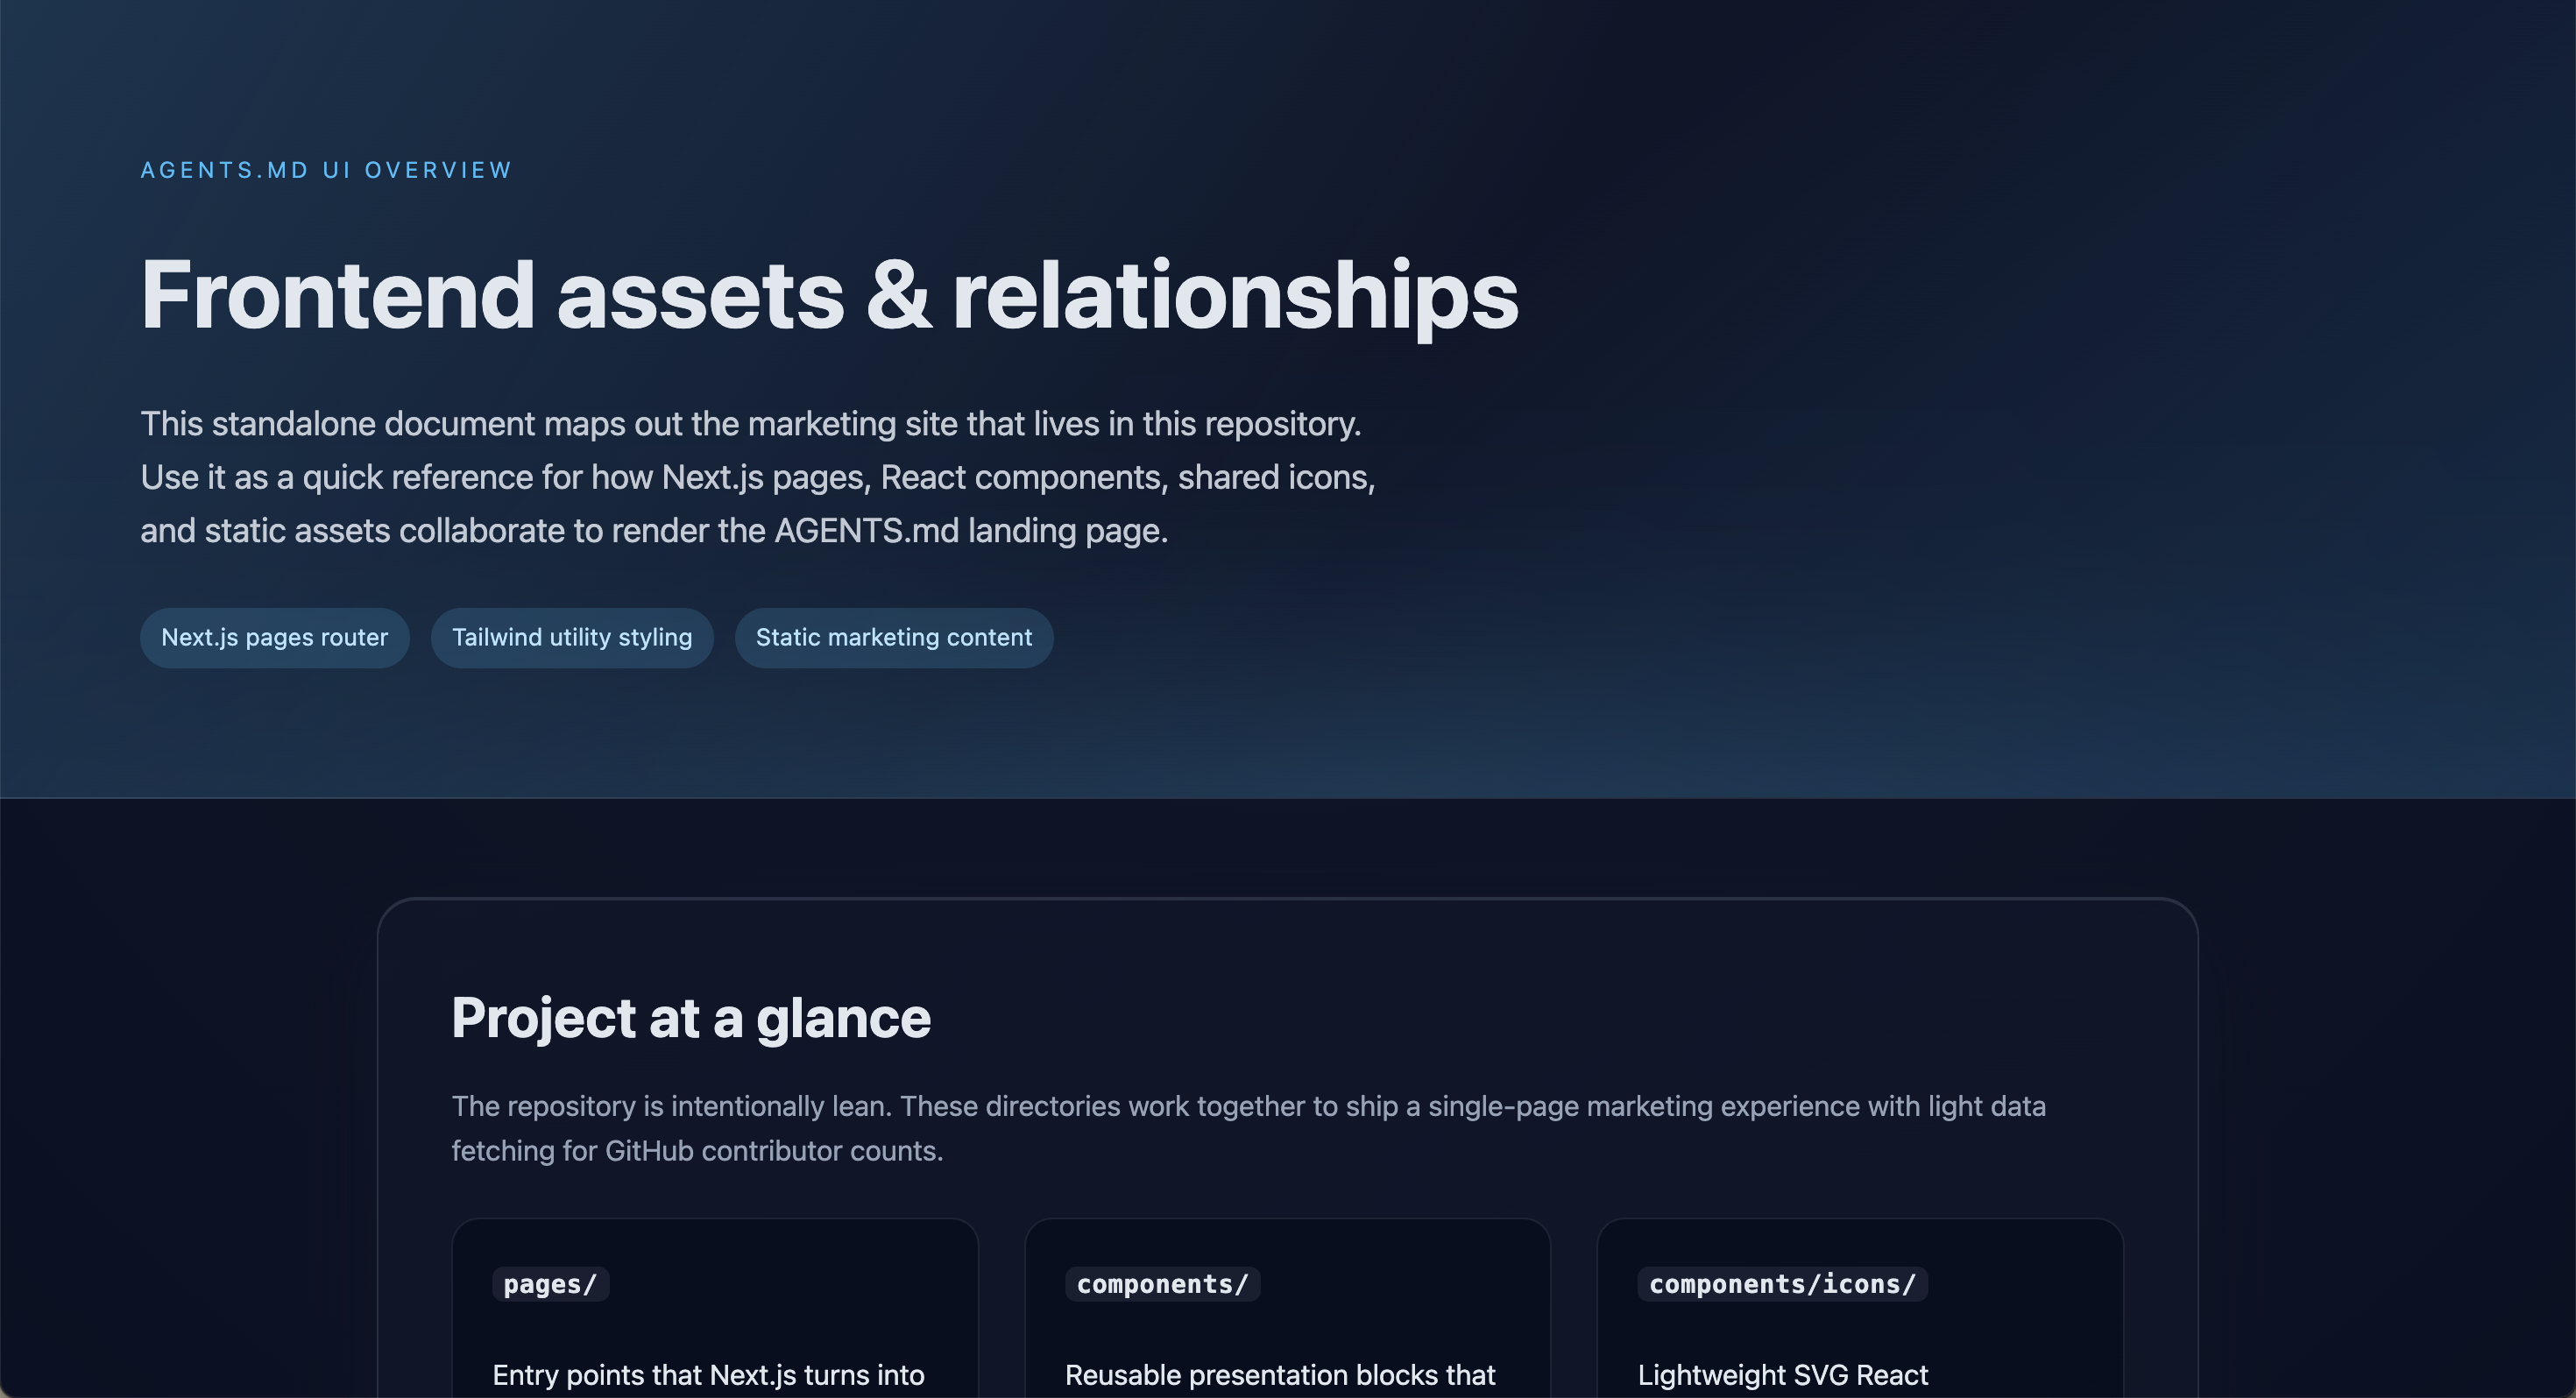
Send:
Create a small HTML page in assets.html that shows how files are related to each others. I want a nice looking assets.html that explain those concepts. -
Review the proposed
assets.htmlchanges in the app diff view and verify the relationships before applying.
-
Have Codex modify the project by applying a patch.
-
Start a new task in the Codex app and send:
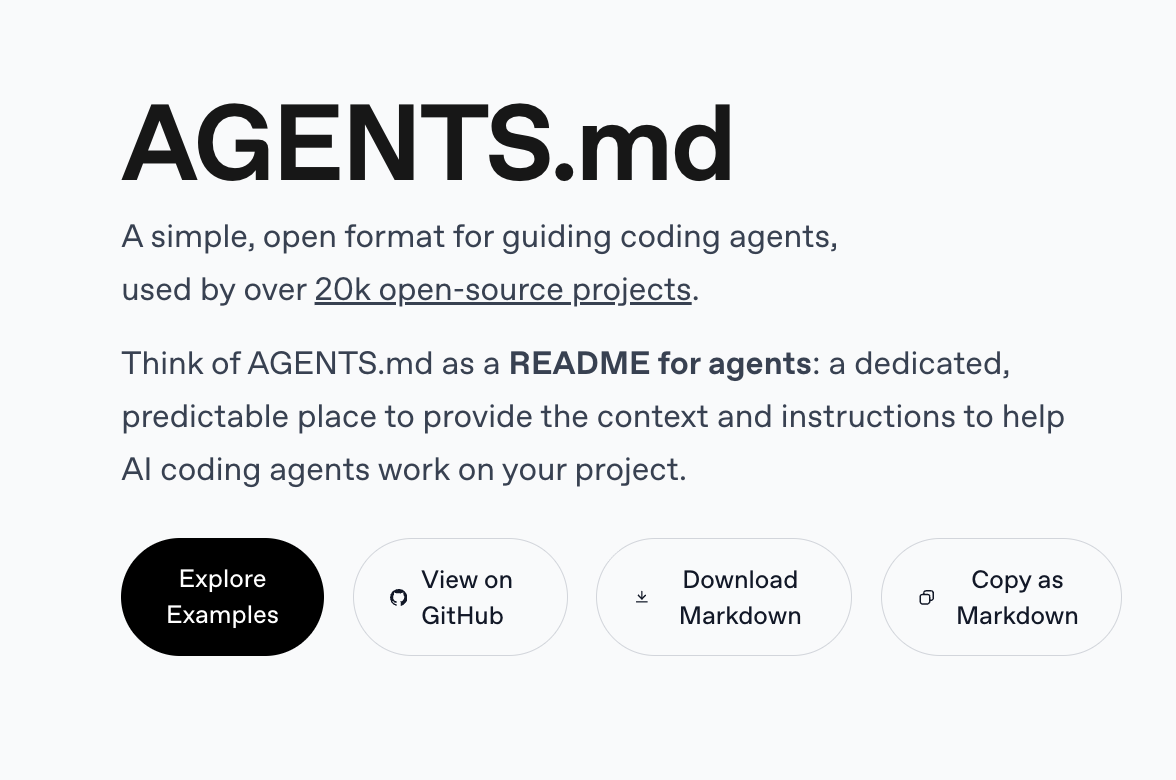
Can you implement, next to the "Explore Examples" and "View on Github" buttons a button to download and another one to copy the page as markdown? -
Review the proposed patch in the app diff before applying changes.
-
Practice attaching visuals and following up with styling tweaks.
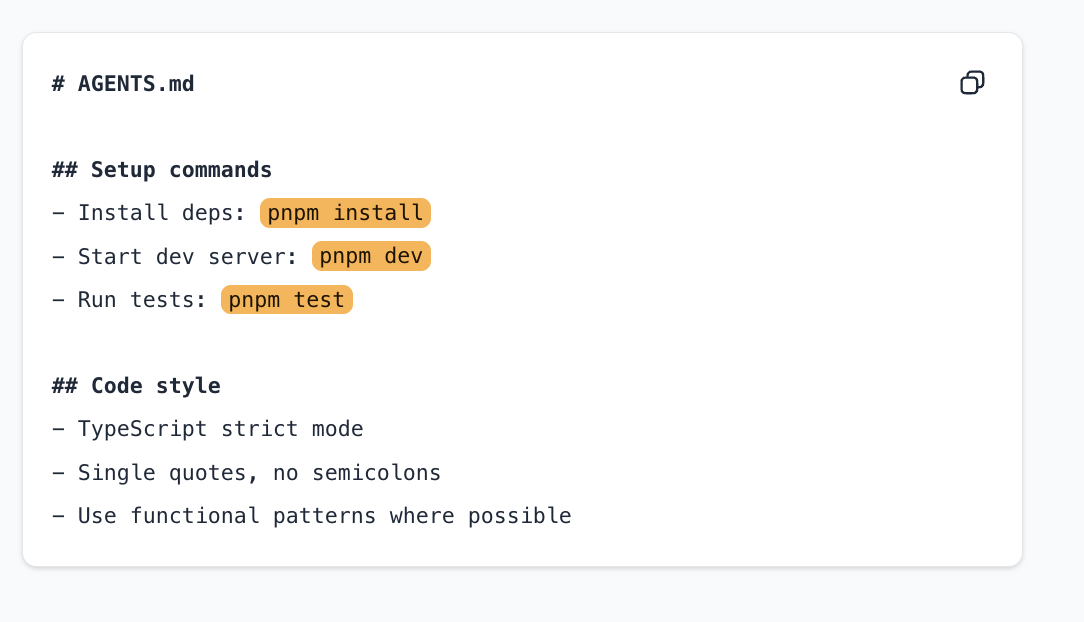
- Capture a screenshot of the Agents.md textarea (top-right of the app).
- In the Codex app project chat, attach the image (or paste it) and add:
Make inline background code chips orange. - Confirm Codex updates the UI styling based on the screenshot.
Learn how to jump back into an existing thread.
- In the Codex app, open the conversation history / recent chats list for the current project.
- Reopen the prior task you want to continue.
- Ask the follow-up prompt (for example, “actually make that green”) and confirm Codex continues with the previous context.
Add the OpenAI developer documentation MCP server so Codex can fetch up-to-date API and SDK details while you work.
-
Open
~/.codex/config.tomland add:[mcp_servers.openaiDeveloperDocs] url = "https://developers.openai.com/mcp" -
Open
~/.codex/AGENTS.md. IfAGENTS.mddoes not exist yet, create it, then add:When questions involve OpenAI APIs, SDKs, Codex, or other OpenAI products, use the OpenAI developer documentation MCP server as the source of truth and avoid web search unless the MCP server cannot answer. -
Restart the Codex app to ensure that the config is reloaded.
-
Verify Codex can reach the OpenAI developer documentation MCP server before you rely on it.
- In a Codex app project chat, run
/mcpto confirm the server connection is healthy andopenaiDeveloperDocsappears. - If it fails, re-check
~/.codex/config.tomland the MCP setup instructions from https://developers.openai.com/codex/mcp, then restart the app and try again.
- In a Codex app project chat, run
Practice using the OpenAI Docs MCP to answer a Voice API question.
-
Start a new project chat in the Codex app.
-
Send:
How do I implement the OpenAI Voice API over WebSockets? Share a minimal example and link to the relevant doc.
-
Learn how to ask Codex for current information from the web.
- Start a new Codex chat in the current project.
- Ask Codex using dictation to add the “Latest News” footer box, explicitly mentioning to use web search and include the article date and source.
- Confirm the response uses current web results before making the edit.
Use Codex to add tests for an existing change and validate the result.
- In the Codex app, reopen the “Latest News” task thread (or any coding thread in the same project).
- Ask Codex to add or update tests for the touched files, keep the diff minimal, and run the appropriate validation command after the change.
- Review the new tests and confirm Codex ran a repo check after editing.
Use
/reviewto inspect a small regression you introduce on purpose.-
In your repo, open
pages/index.tsxand scroll to thegetStaticPropsloop that buildscontributorsByRepo. Inside that loop, right before thecontributorsByRepo[fullName] = { avatars, total }assignment, add one line:total++;Leave everything else unchanged so the counter quietly creeps up by one.
-
In the Codex app project chat, run
/review, choose Review uncommitted changes - if this doesn't work then choose Review against a base branch, and selectmain. -
Read the findings that flag the inflated total, then apply the suggested fix (remove the extra
total++) and rerun if desired.
-
Bookmark the go-to references for deeper Codex work.
- Open the product hub at https://developers.openai.com/codex for docs, demos, and release notes.
- Explore the Codex SDK: https://developers.openai.com/codex/sdk.
- Review the GitHub Action wiring guide: https://developers.openai.com/codex/sdk#github-action.
- Track updates via the changelog: https://developers.openai.com/codex/changelog.
Ask Codex about its own feature support while inside the Codex repo.
- Clone the public repo:
git clone https://github.com/openai/codex.git. - In the Codex app, select the
codexfolder as your project. - Start a new project chat and send this prompt
Looking into codex-rs, tell me how much context is allocated to MCP tool call when we use Codex? As a reminder, you're in the Codex repo so you have access on how Codex is built..
- Clone the public repo:
Skills are reusable workflow packs. On the default setup, personal skills live in
~/.codex/skills, and anything you place there is available across the CLI, IDE, and app. If you use a customCODEX_HOME, use$CODEX_HOME/skillsinstead.-
Open the
Pluginssidebar.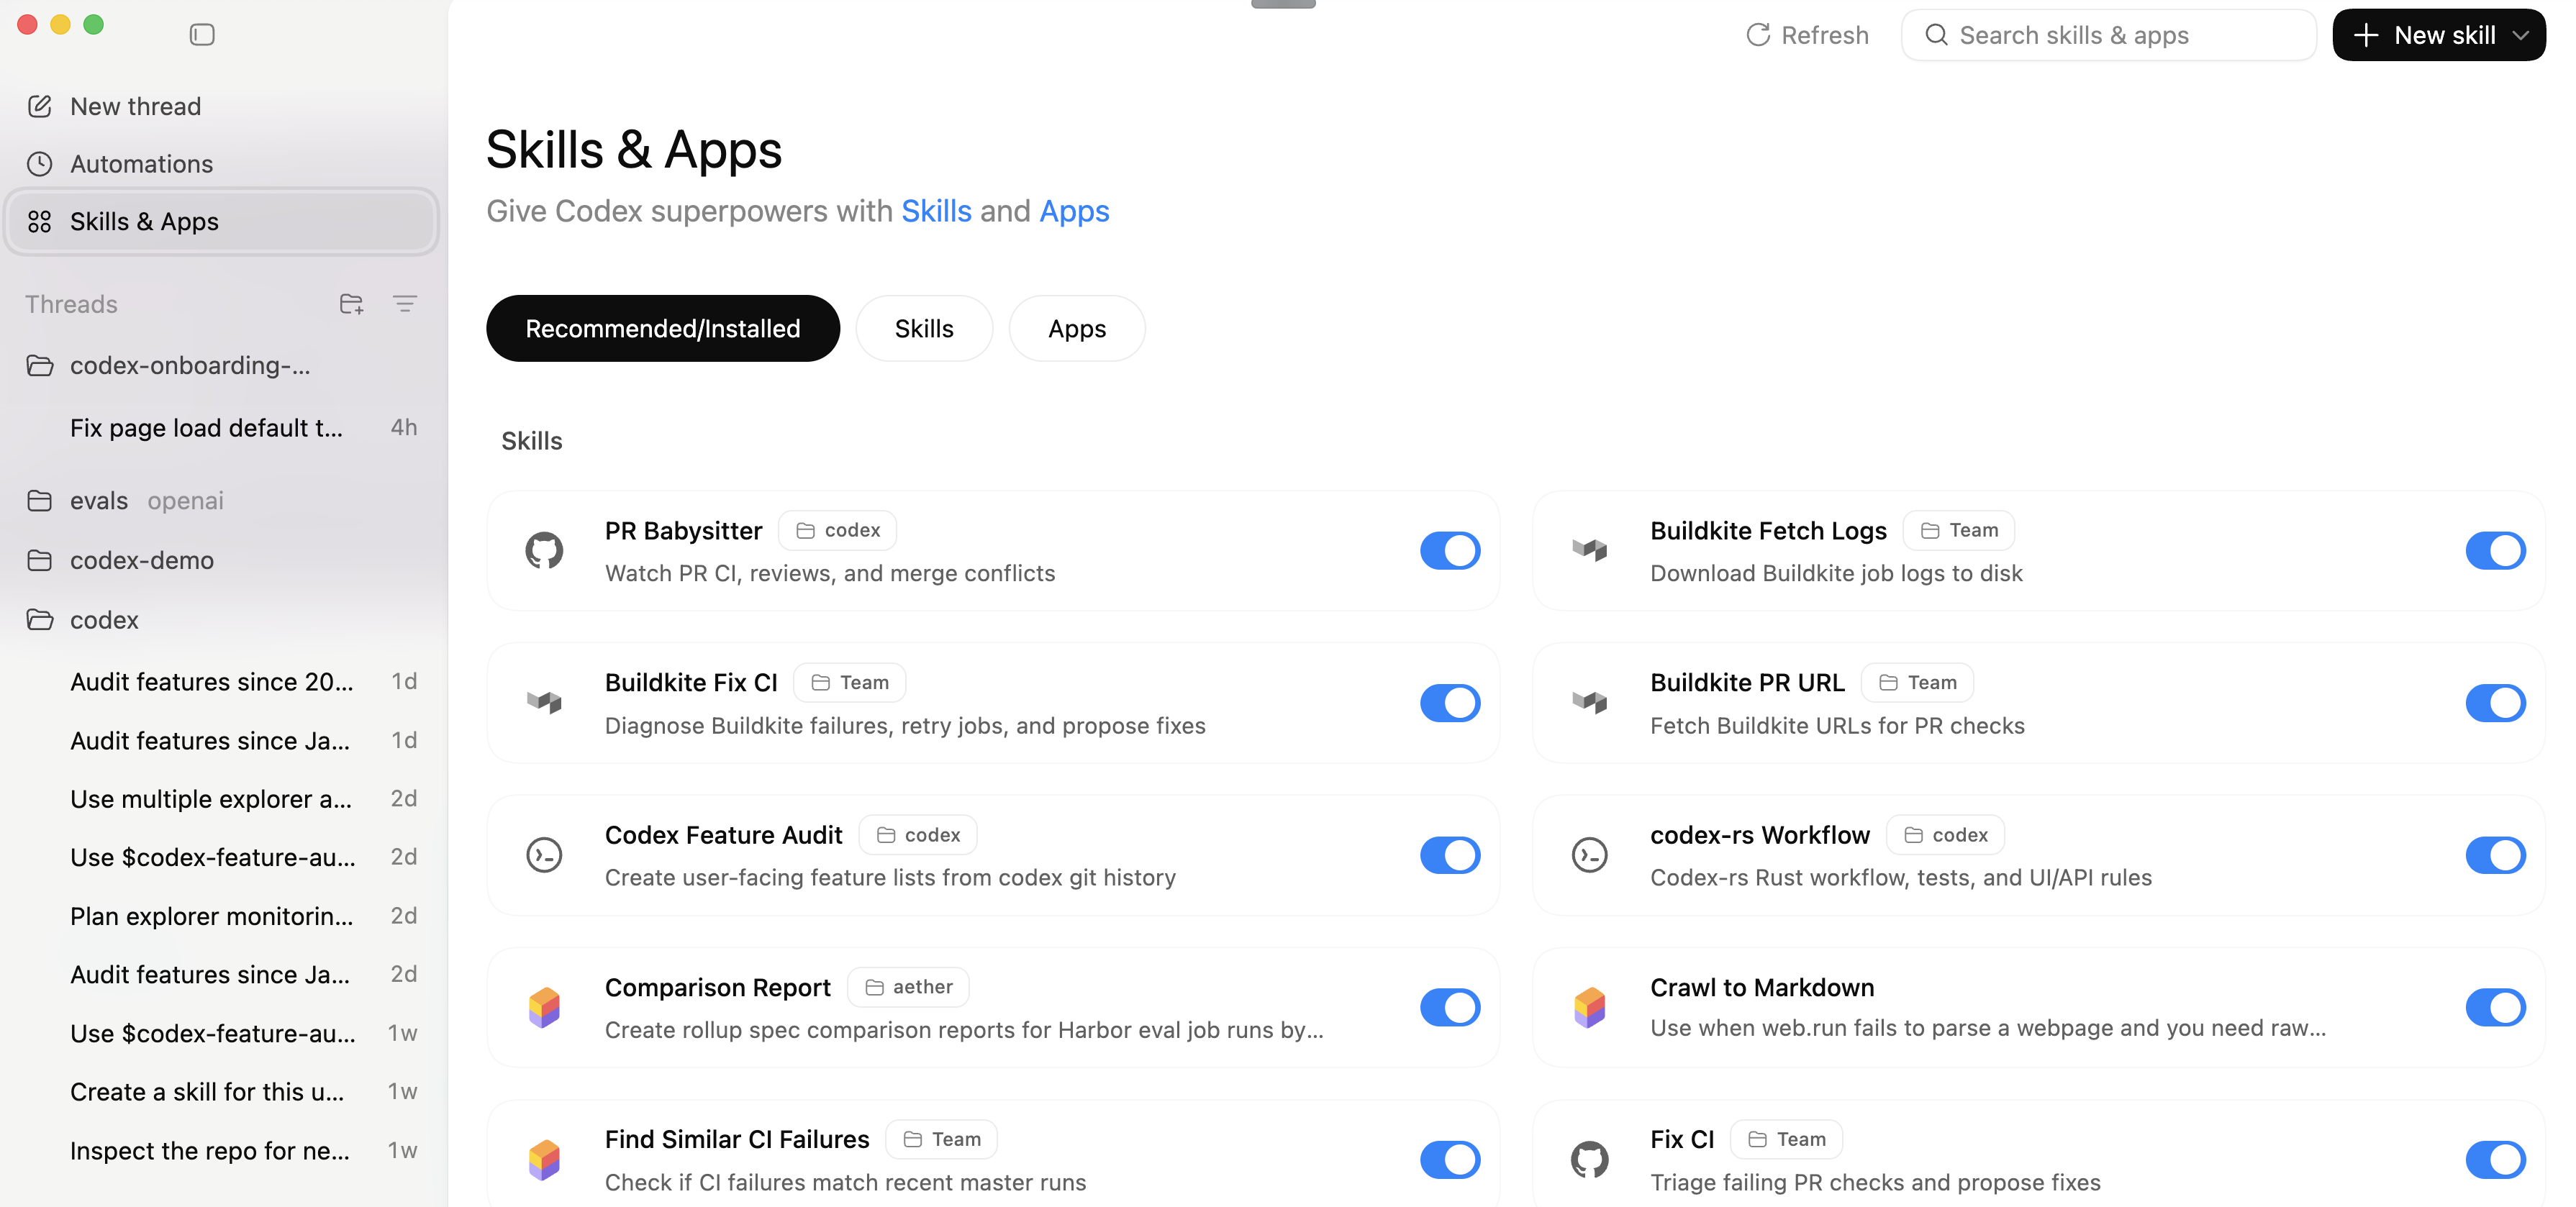
-
Browse or search the list for any skills that look relevant to your work.
-
Switch between the available plugin tabs.
-
Inspect one enabled plugin and note whether it adds a reusable skill, a connected app, or both.
-
Ask Codex:
Explain what the $skill-creator skill does and when I should use it. Then look at the plugins available in this project, explain what each enabled item adds, and tell me whether any of them needs an account connection before it can read workspace data. -
Pick one enabled item and ask a safe follow-up that uses it on non-sensitive context.
-
Remember that any skill copied into
~/.codex/skillson the default setup should also appear here, not just in the terminal-based surfaces.
-
Create a simple skill named
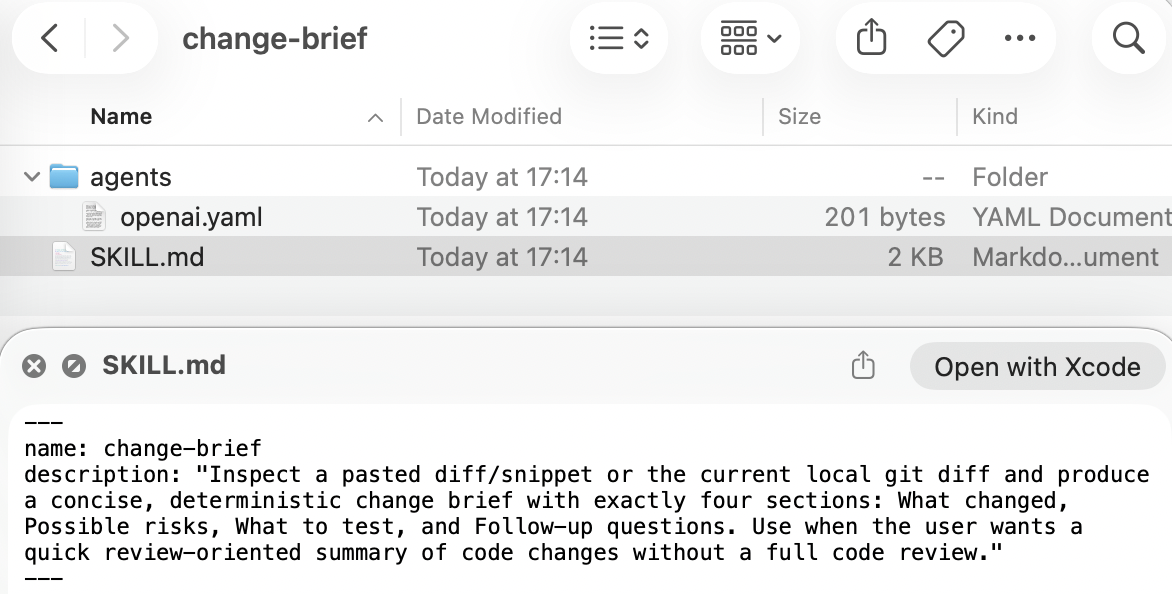
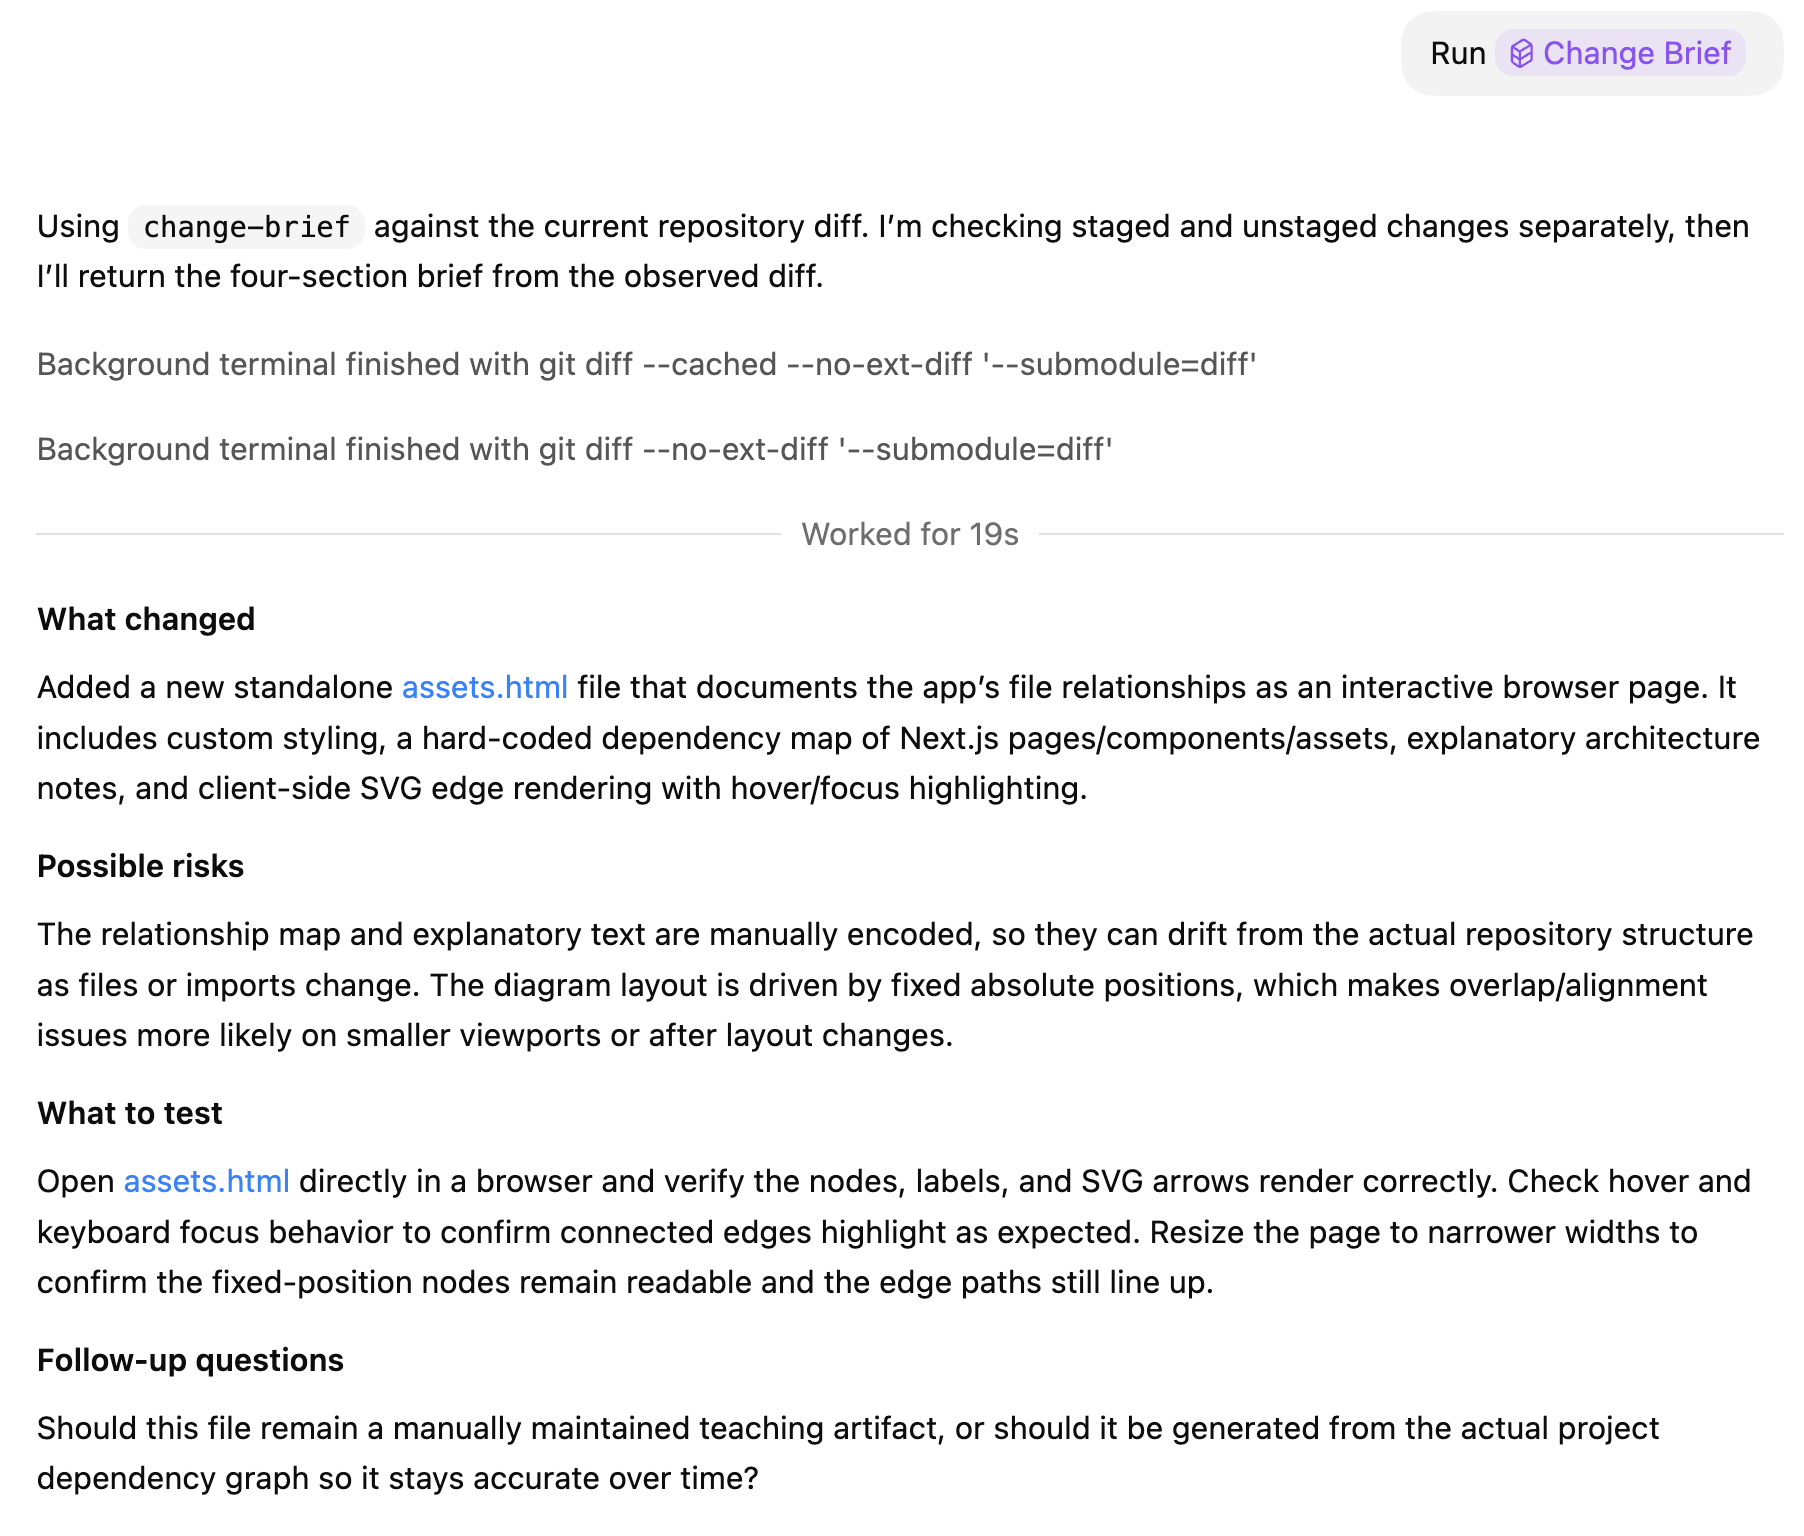
change-brief. If you want a team skill that travels with the current repo, put it under.codex/skills/in the repo. For this exercise, create a personal global skill under~/.codex/skills/change-briefon the default setup, or$CODEX_HOME/skills/change-briefif you use a customCODEX_HOME, so it becomes available across repos and surfaces.Start by asking Codex:
Use the $skill-creator skill to create a personal skill named change-brief under ~/.codex/skills/change-brief. The skill should inspect the current git diff or a pasted snippet and produce exactly four sections: What changed, Possible risks, What to test, and Follow-up questions. Keep it concise and deterministic. If a section has nothing to report, say "None."This is what the generated skill folder should look like:
The skill should always produce these four sections:
What changedPossible risksWhat to testFollow-up questions
If a section has nothing to report, it should say
None..This is what the skill output should look like:
-
Open
Pluginsand locateskill-creator, then use the shared prompt above to createchange-brief. -
If the repo has no current diff, make a tiny one-line change so the skill has something to inspect.
-
Invoke the new skill by either selecting it from the
Pluginssidebar or typing$and choosingchange-brief. -
Run one of these simple prompts:
Run $change-briefor:
Use $change-brief on the current diff -
If the skill does not appear right away, restart the app project session and try again.
This workshop uses the built-in agent roster
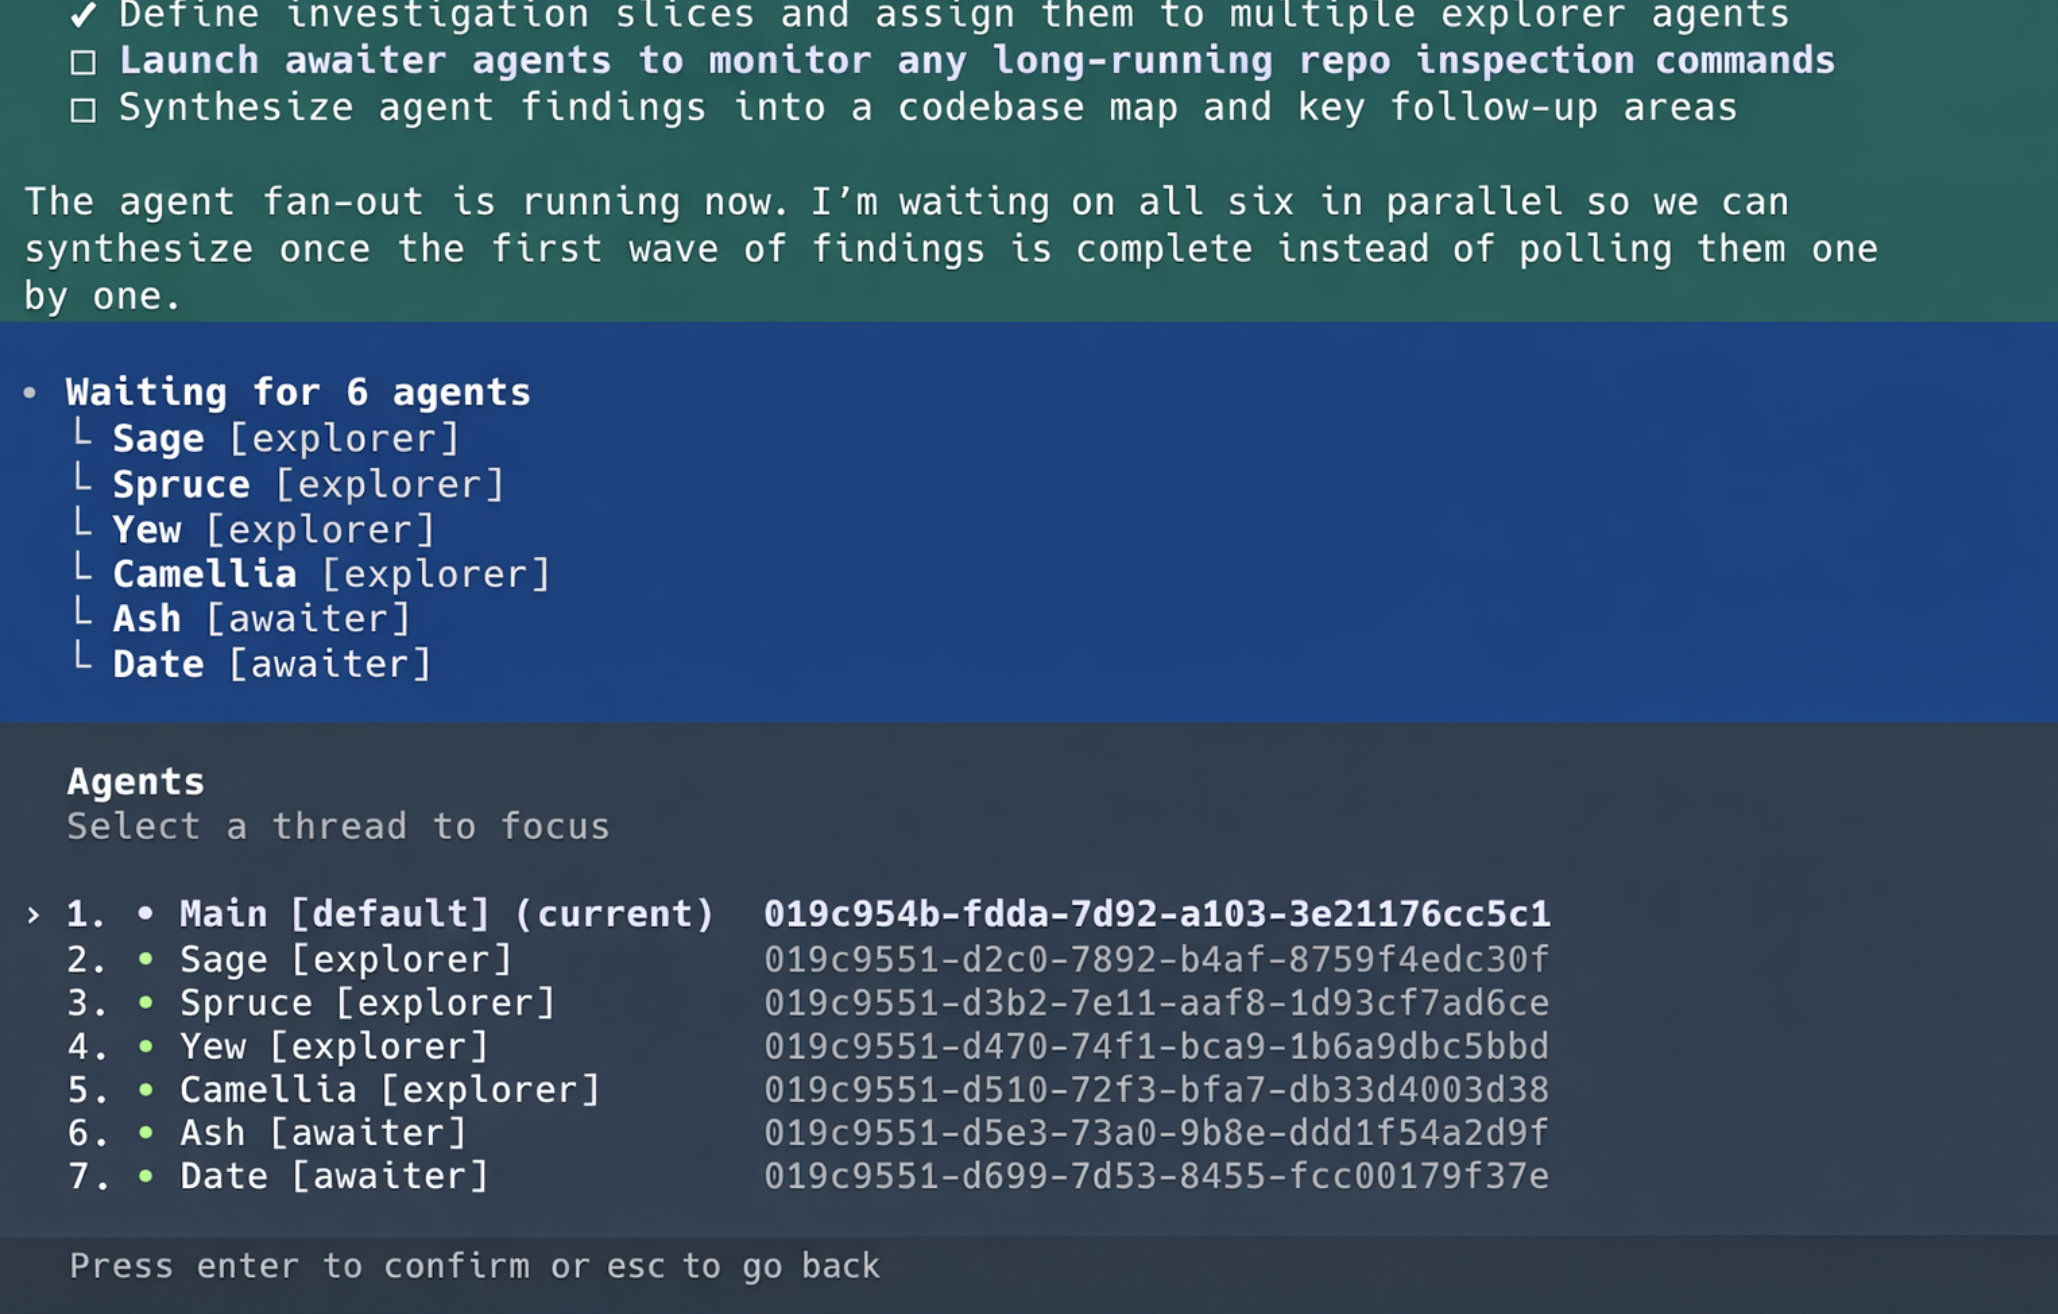
default,worker,explorer, andmonitor. Start with the built-ins before you customize any agent roles or config files.Ask Codex:
Use multiple explorer and monitor agents to investigate this codebase. Plan how you will distribute the work before you start.-
Run the prompt above in the app chat.
-
If multi-agent behavior is not available in your current setup, enable it in
~/.codex/config.toml, restart the app project session, and rerun the prompt. -
This surface may use agents under the hood, but it does not expose
/agent. -
The screenshot below is a CLI example of what agent visibility looks like there.
Advanced configuration: once the built-in flow works, you can customize roles and role-specific config files. For example, you might add a
reviewerrole like this:[agents.reviewer] description = "High-rigor reviewer for risky changes." config_file = "./agents/reviewer.toml"# ./agents/reviewer.toml model = "gpt-5.5" model_reasoning_effort = "high" developer_instructions = "Focus on high priority issues, write tests to validate hypothesis before flagging an issue. When finding security issues give concrete steps on how to reproduce the vulnerability."You can also override the built-in
explorerrole with a dedicated config file:[agents.explorer] description = "Fast codebase explorer for read-heavy tasks." config_file = "./agents/custom-explorer.toml"# ./agents/custom-explorer.toml model = "gpt-5.3-codex-spark" sandbox_mode = "read-only"-
Agents do not all have to use the same model. You can override an existing agent or add a new one with a role-specific config file.
For example, add a new
revieweragent in~/.codex/config.tomllike this:[agents.reviewer] description = "High-rigor reviewer for risky changes." config_file = "./agents/reviewer.toml"Then define the role-specific settings in
./agents/reviewer.toml:# ./agents/reviewer.toml model = "gpt-5.5" model_reasoning_effort = "high" developer_instructions = "Focus on high priority issues, write tests to validate hypothesis before flagging an issue. When finding security issues give concrete steps on how to reproduce the vulnerability. Report any issues found in the code review grouped by categories"Restart Codex after saving the config change so the updated agent definitions are loaded.
- After you've added the
reviewerexample above to your config files, restart Codex. - Ask Codex to use your
revieweragent for a risky change and confirm that the custom role is available, with e.g:Using the reviewer subagent, make a review of the uncommitted changes
- After you've added the
Worktrees are the safest way to keep parallel changes isolated. The app exposes this directly through
Move to worktree(on the top-right of the Codex app), while the CLI and IDE rely on standard Git worktree commands. For further reading on the Git workflow itself, see git worktree.-
Open the repo as a project in the app.
-
Start a task with uncommitted changes, then use the app's
Move to worktreeUI.
-
In the
Check out locallyfield, choose an existing local branch to switch your current checkout to, such asmain. -
Confirm that the current branch and all uncommitted changes are being moved out of your current checkout and into a new local worktree that Codex creates on disk for that thread.
-
Continue the move, then open or switch into the new worktree-backed thread in the app.
-
If you want to understand the underlying Git workflow in more detail, read git worktree.
-
Automations let the app run a recurring prompt later. In this exercise, keep the automation paused so it does not run after training.
-
Open
Automationsfrom the app sidebar. -
Ask Codex:
Create a paused weekly automation named Training changelog scan. Every Monday morning, it should check the Codex changelog and open an inbox item summarizing any updates relevant to this training repo. Keep it paused for practice. -
Review the resulting automation card and confirm the name, cadence, and paused state.
-
Confirm the automation remains paused.
-
Ask Codex how you would make the automation active when you are ready.
-
Delete the practice automation if you do not want to keep it.
-
Strong warning: memories are currently experimental. Turn them on only if you are comfortable trying an in-progress feature and having Codex build a local memory workspace under
~/.codex/memories. Do not use them for secrets. On the default setup, the memory root is~/.codex/memories. If you use a customCODEX_HOME, the path is$CODEX_HOME/memories.Memories work like this:
- In the background, sessions are consolidated into a local (as in, in your computer) memory workspace.
- Memories then influence future sessions by injecting a compact summary available for lookup.
- Codex can better carry forward durable preferences, recurring project context, and prior decisions across sessions.
Placeholder example of what
~/.codex/memoriescan look like after the feature has been enabled for a while:~/.codex/memories/ memory_summary.md MEMORY.md raw_memories.md rollout_summaries/ 2026-02-17T21-23-02-example-thread.md 2026-02-19T09-11-48-example-thread.md skills/ <skill-name>/ SKILL.md ...Filenames will vary.
MEMORY.md,memory_summary.md, andskills/are higher-level consolidation artifacts, so they may be absent or removed when the memory workspace has little or no retained content yet.Example contents from
~/.codex/memories/memory_summary.mdafter memories have been enabled for a while:## User Profile This user uses Codex across the CLI, IDE, and app for hands-on engineering work. They prefer concise, actionable answers, like concrete test steps, and often return to the same repositories over multiple sessions.The steps below turn memories on. Keep the warning above in mind before you enable them.
-
Open
~/.codex/config.tomland enable memories:[features] memories = true -
Restart the app project session.
-
Use Codex normally for a while. Memories run asynchronously in the background, so do not expect them to affect the next prompt immediately.
-
After you have used Codex with memories enabled for a while, inspect
~/.codex/memories/in a terminal or Finder and openmemory_summary.mdto compare what you see with the examples above.